Container 개념과 Container Image Build 방식 정리
CloudNet@ Gasida님이 진행하는 CI/CD + ArgoCD + Vault Study 를 진행하며 학습한 내용을 공유합니다.
이번 포스트에서는 O’Reilly GitOps Cookbook 의 3장에 해당 하는 Container 개념과 Container Image Build 방식에 대해 알아보겠습니다.
1. Container란?
Container는 애플리케이션을 배포 목적으로 패키징할 때 널리 사용되는 표준형식입니다. 즉, 실행에 필요한 코드, 라이브러리, 런타임, 설정 파일 등을 하나의 독립된 단위로 묶어, 어디서나 동일한 환경에서 실행되도록 보장하는 기술입니다. 해당 기술은 과거 개발 환경과 운영 환경의 불일치로 인해 동일한 App이 개발 환경에서는 동작하지만, 운영 환경에서는 동작하지 않는 문제를 해결하기 위한 목적으로 만들어졌습니다.
현재 대부분의 Container는 OCI(Open Container Initiative) 표준에 맞게 생성 됩니다. 따라서 서로 다른 운영체제, 공급업체, 플랫폼 또는 클라우드 사이에서의 이식성과 상호 운용성을 보장합니다. 즉 한번 빌드된 Container Image는 어떤 인프라 환경에서도 동일하게 동작합니다.
1.1. OCI(Open Container Initiative) 표준의 구성
| 구분 | 설명 |
|---|---|
| Image Specification | Container Image의 구조를 정의합니다. (예: 레이어 구조, config.json 등) |
| Runtime Specification | 이미지가 실행되는 런타임의 동작 방식을 정의합니다. (예: namespace, cgroup, filesystem mount 등) |
| Distribution Specification | Container Image를 저장하고 전달하는 방식을 정의합니다. (예: registry API, manifest 등) |
1.2. Container Image Layers
Container Image는 아래 그림과 같은 계층 구조(layered structure) 를 갖고 있으며, 새로운 변경이 적용될 때마다 해당 변경사항에 대한 Layer가 하나씩 추가로 커밋(commit) 됩니다. 즉, 각 명령(RUN, COPY, ADD 등)이 실행될 때마다 새로운 레이어가 생성되어 누적됩니다.
이러한 구조 덕분에 컨테이너 이미지는 효율적인 버전 관리와 재사용이 가능합니다. 하위 레이어(Base Image 등)는 변경되지 않으면 다시 빌드할 필요가 없고, 변경된 부분만 새로운 레이어로 추가되어 최종 이미지를 구성합니다.
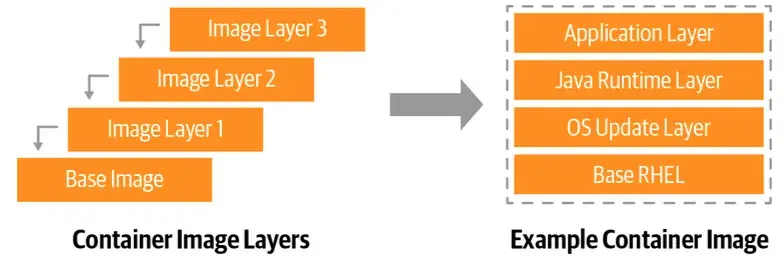
O’Reilly GitOps Cookbook: Kubernetes Automation in Practice
Container Image Layers - 3.1. 도커를 사용한 컨테이너 빌드 p.23
1.3. Container Image Build 방식의 종류
Container를 만들기 위해서는 Container Image를 빌드해야 합니다. Container Image를 빌드하는 방식은 아래와 같이 나뉩니다. 자세한 내용은 아래 실습에서 다루겠습니다.
1.3.1. Container Image Build 방식 요약
| 빌드 도구 | 필요 데몬 | 주요 특징 | 비고 |
|---|---|---|---|
| Docker | 필요 (Daemon 기반) | 전통적이고 직관적인 이미지 빌드 방식 | 가장 널리 사용됨 |
| Jib | 불필요 (Dockerless) | Java 기반, Gradle/Maven 통합 | JVM 애플리케이션에 최적 |
| Buildah | 불필요 (Daemonless) | 언어 비종속, Rootless 지원 | 보안 강화 및 CI 적합 |
| Buildpack | 불필요 (Daemonless) | 자동 빌드, Dockerfile 불필요 | Cloud Native Buildpack |
| Shipwright + Kaniko | 불필요 (Daemonless, Kubernetes) | Kubernetes 상에서 빌드 수행 | 완전한 클라우드 네이티브 |
2. 실습 환경 준비
2.1. Git Repository Clone
1
git clone https://github.com/gitops-cookbook/chapters
2.2. Docker Hub 계정 준비
Docker Hub는 Docker Image 원격 저장소입니다. 사용 방법은 아래 링크를 통해 확인할 수 있습니다.
- Docker Hub Quick Start - https://docs.docker.com/docker-hub/quickstart/
2.3. Local Kubernetes 생성 (kind k8s - v1.32)
- kind - https://kind.sigs.k8s.io/docs/user/quick-start/
- kubectl - https://kubernetes.io/ko/docs/tasks/tools/
- helm - https://helm.sh/docs/intro/install/
- krew - https://krew.sigs.k8s.io/docs/user-guide/setup/install/
- kube-ps1 - https://github.com/jonmosco/kube-ps1
- kubectx - https://github.com/ahmetb/kubectx
- k9s - https://k9scli.io/topics/install/
2.3.1. 필수 툴 설치
1
2
3
4
5
6
7
8
9
10
11
12
13
14
15
16
17
18
19
20
21
22
##############################################################
# Install Kind
##############################################################
brew install kind
kind --version

##############################################################
# Kubectl 설치
##############################################################
brew install kubernetes-cli
kubectl version --client=true

##############################################################
# kubectl -> k 단축키 설정
##############################################################
echo "alias kubectl=k" >> ~/.zshrc

##############################################################
# Helm 설치
##############################################################
brew install helm
helm version
2.3.2. 권장 툴 설치
1
2
3
4
5
6
7
8
9
10
11
12
13
14
15
16
17
18
19
##############################################################
# 툴 설치
##############################################################
brew install krew
brew install kube-ps1
brew install kubectx
brew install k9s

##############################################################
# kubectl 출력 시 하이라이트 처리
##############################################################
brew install kubecolor
echo "alias kubectl=kubecolor" >> ~/.zshrc
echo "compdef kubecolor=kubectl" >> ~/.zshrc

##############################################################
# k8s krew path : ~/.zshrc 아래 추가
##############################################################
export PATH="${KREW_ROOT:-$HOME/.krew}/bin:$PATH"
2.3.3. Kind Cluster 생성
1
2
3
4
5
6
7
8
9
10
11
12
13
14
15
16
17
18
19
20
21
22
23
24
25
26
27
28
29
30
31
32
33
34
35
36
37
38
39
40
41
42
43
44
45
46
47
48
49
50
51
52
53
54
55
56
57
58
59
60
61
62
63
64
65
66
67
68
69
70
71
72
73
74
75
76
77
78
79
##############################################################
# docker 확인
##############################################################
docker info
docker ps

##############################################################
# 실습에서 사용할 Kind Cluster 배포
##############################################################
kind create cluster --name myk8s --image kindest/node:v1.32.8 --config - <<EOF
kind: Cluster
apiVersion: kind.x-k8s.io/v1alpha4
nodes:
- role: control-plane
  extraPortMappings:
  - containerPort: 30000
    hostPort: 30000
  - containerPort: 30001
    hostPort: 30001
- role: worker
EOF

##############################################################
# Kind Cluster 배포 확인
##############################################################
kind get nodes --name myk8s
# myk8s-control-plane
# myk8s-worker

kubectl get node -o wide
# NAME                  STATUS   ROLES           AGE     VERSION   INTERNAL-IP   EXTERNAL-IP   OS-IMAGE                         KERNEL-VERSION                     CONTAINER-RUNTIME
# myk8s-control-plane   Ready    control-plane   10m     v1.32.8   172.18.0.3    <none>        Debian GNU/Linux 12 (bookworm)   6.6.87.2-microsoft-standard-WSL2   containerd://2.1.3
# myk8s-worker          Ready    <none>          9m56s   v1.32.8   172.18.0.2    <none>        Debian GNU/Linux 12 (bookworm)   6.6.87.2-microsoft-standard-WSL2   containerd://2.1.3


kubectl get pod -A -o wide
# NAMESPACE            NAME                                          READY   STATUS    RESTARTS   AGE   IP           NODE                  NOMINATED NODE   READINESS GATES
# kube-system          coredns-668d6bf9bc-mwww4                      1/1     Running   0          10m   10.244.0.3   myk8s-control-plane   <none>           <none>
# kube-system          coredns-668d6bf9bc-p4wb7                      1/1     Running   0          10m   10.244.0.2   myk8s-control-plane   <none>           <none>
# kube-system          etcd-myk8s-control-plane                      1/1     Running   0          10m   172.18.0.3   myk8s-control-plane   <none>           <none>
# kube-system          kindnet-hq2qh                                 1/1     Running   0          10m   172.18.0.2   myk8s-worker          <none>           <none>
# kube-system          kindnet-xnn6t                                 1/1     Running   0          10m   172.18.0.3   myk8s-control-plane   <none>           <none>
# kube-system          kube-apiserver-myk8s-control-plane            1/1     Running   0          10m   172.18.0.3   myk8s-control-plane   <none>           <none>
# kube-system          kube-controller-manager-myk8s-control-plane   1/1     Running   0          10m   172.18.0.3   myk8s-control-plane   <none>           <none>
# kube-system          kube-proxy-r2mxf                              1/1     Running   0          10m   172.18.0.3   myk8s-control-plane   <none>           <none>
# kube-system          kube-proxy-sd6nq                              1/1     Running   0          10m   172.18.0.2   myk8s-worker          <none>           <none>
# kube-system          kube-scheduler-myk8s-control-plane            1/1     Running   0          10m   172.18.0.3   myk8s-control-plane   <none>           <none>
# local-path-storage   local-path-provisioner-7dc846544d-6jlpv       1/1     Running   0          10m   10.244.0.4   myk8s-control-plane   <none>           <none>

##############################################################
# k8s api 주소 확인 : 어떻게 로컬에서 접속이 되는 걸까? -> Host, Docker Container 간 포트포워딩
##############################################################
kubectl cluster-info
# Kubernetes control plane is running at https://127.0.0.1:43885
# CoreDNS is running at https://127.0.0.1:43885/api/v1/namespaces/kube-system/services/kube-dns:dns/proxy

# 포트 포워딩 설정 확인 (Local 43885 -> API-Server 6443)
docker ps
# CONTAINER ID   IMAGE                  COMMAND                  CREATED         STATUS         PORTS                                                             NAMES
# 2073c0310653   kindest/node:v1.32.8   "/usr/local/bin/entr…"   8 minutes ago   Up 8 minutes   0.0.0.0:30000-30001->30000-30001/tcp, 127.0.0.1:43885->6443/tcp   myk8s-control-plane
# 0df7c2161ed8   kindest/node:v1.32.8   "/usr/local/bin/entr…"   8 minutes ago   Up 8 minutes                                                                     myk8s-worker

# kube config 확인
kubectl config view | yq '.clusters[] | select(.name=="kind-myk8s")'
# cluster:
#   certificate-authority-data: DATA+OMITTED
#   server: https://127.0.0.1:43885
# name: kind-myk8s

# Listening Port 확인
netstat -ano | grep 43885
# tcp        0      0 127.0.0.1:43885         0.0.0.0:*               LISTEN      off (0.00/0/0)

##############################################################
# Kind Cluster 네트워크 정보 및 상세 확인
##############################################################
# Docker Bridge Network (Default: 172.18.0.0/16)
docker network ls
docker inspect kind | jq
3. Docker를 사용한 Container Image Build
가장 널리 사용되는 컨테이너 엔진인 Docker를 사용해 기본 OS 위에 런타임, 라이브러리, 애플리케이션 등의 레이어(layer) 를 쌓아 올려 하나의 패키지로 묶는 방식입니다. 백그라운드에서 Docker Daemon이라는 프로세스가 실행되며, 사용자는 CLI나 SDK를 통해 이 데몬과 상호작용합니다. 컨테이너 이미지는 Dockerfile이라는 manifest 파일에 정의된 명령어(FROM, RUN, COPY, CMD 등)를 기반으로 빌드됩니다. Docker 방식은 직관적이고 친숙하지만, 데몬 권한이 필요한 구조이므로 보안상 제약이 생길 수 있습니다.
3.1. Docker를 사용한 Container Image Build 흐름

3.2. Docker를 사용한 Container Image Build 실습
1
2
3
4
5
6
7
8
9
10
11
12
13
14
15
16
17
18
19
20
21
22
23
24
25
26
27
28
29
30
31
32
33
34
35
36
37
38
39
40
41
42
43
44
45
46
47
48
49
50
51
52
53
54
55
56
57
58
59
60
61
62
63
64
65
66
67
68
69
70
71
72
73
74
75
76
77
78
79
80
81
82
83
84
85
86
87
88
89
90
91
92
93
94
95
96
97
98
99
100
101
102
103
104
105
106
107
108
109
110
111
112
113
114
##############################################################
# 실습 Git Repository Clone 및 Dockerfile 확인
##############################################################
# Git Clone
git clone https://github.com/gitops-cookbook/chapters

# 경로 이동
cd chapters/chapters/ch03/python-app

# Application Code 확인 (Flask)
cat app.py

# app.py 내용
from flask import Flask

app = Flask(__name__)

@app.route("/")
def home():
    return "Hello, World!"

if __name__ == "__main__":
    app.run(host='0.0.0.0', port=8080, debug=True)

# Dockerfile 확인
cat Dockerfile

# Dockerfile 내용
FROM registry.access.redhat.com/ubi8/python-39
ENV PORT 8080
EXPOSE 8080
WORKDIR /usr/src/app

COPY requirements.txt ./
RUN pip install --no-cache-dir -r requirements.txt

COPY . .

ENTRYPOINT ["python"]
CMD ["app.py"]

##############################################################
# Base Image Layers 확인 (위 Dockerfile을 사용해 빌드된 이미지는 Base Layer에 변경사항에 대한 Layer가 추가되는 형식으로 진행될 예쩡)
##############################################################
docker pull registry.access.redhat.com/ubi8/python-39
docker images ls
docker inspect registry.access.redhat.com/ubi8/python-39 | jq '.[].RootFS.Layers'
# [
#   "sha256:efbb01c414da9dbe80503875585172034d618260b0179622a67440af141ada49",
#   "sha256:0e770dacd8dd8e0f783addb2f8e2889360ecc1443acc1ca32f03158f8b459b14",
#   "sha256:03b1af2d2f1752f587c99bf9afca0a564054b79f46cf22cef211f86f1d4a4497",
#   "sha256:ae81327beceb885cbdb2663e2f89e6e55aaa614f5ce2d502f772420d6fe37f2f"
# ]

##############################################################
# 해당 Dockerfile을 사용해 Container Image Build
##############################################################
# 실습 편의를 위한 Shell 변수 정의
MYREGISTRY=docker.io
MYUSER=kkankkandev # 본인의 Docker Hub 계정명

# 변수 확인
echo "$MYREGISTRY \n$MYUSER"
docker.io
kkankkandev

# Dockerfile을 사용해 Container Image Build
docker build -f Dockerfile -t $MYREGISTRY/$MYUSER/pythonapp:latest .
# [+] Building 3.2s (10/10) FINISHED                                                                                                                                                                                       docker:default
#  => [internal] load build definition from Dockerfile                                                                                                                                                                               0.0s
#  => => transferring dockerfile: 257B                                                                                                                                                                                               0.0s
#  => [internal] load metadata for registry.access.redhat.com/ubi8/python-39:latest                                                                                                                                                  0.1s
#  => [internal] load .dockerignore                                                                                                                                                                                                  0.0s
#  => => transferring context: 2B                                                                                                                                                                                                    0.0s
#  => [1/5] FROM registry.access.redhat.com/ubi8/python-39:latest@sha256:1f8117d04c016fc6c161d4809e0b89f33c31a545a3217573bf1edbca30d105da                                                                                            0.1s
#  => => resolve registry.access.redhat.com/ubi8/python-39:latest@sha256:1f8117d04c016fc6c161d4809e0b89f33c31a545a3217573bf1edbca30d105da                                                                                            0.0s
#  => [internal] load build context                                                                                                                                                                                                  0.0s
#  => => transferring context: 525B                                                                                                                                                                                                  0.0s
#  => [2/5] WORKDIR /usr/src/app                                                                                                                                                                                                     0.0s
#  => [3/5] COPY requirements.txt ./                                                                                                                                                                                                 0.0s
#  => [4/5] RUN pip install --no-cache-dir -r requirements.txt                                                                                                                                                                       2.1s
#  => [5/5] COPY . .

# Build 된 Container Image 확인
docker image ls
# REPOSITORY                                  TAG       IMAGE ID       CREATED          SIZE
# kkankkandev/pythonapp                       latest    ec76dd61a91a   49 seconds ago   1.29GB
# registry.access.redhat.com/ubi8/python-39   latest    1f8117d04c01   3 days ago       1.28GB
# kindest/node                                v1.32.8   abd489f042d2   7 weeks ago      1.5GB

##############################################################
# Container Image Layer 비교
##############################################################

# 기존 Layer
# [
#   "sha256:efbb01c414da9dbe80503875585172034d618260b0179622a67440af141ada49",
#   "sha256:0e770dacd8dd8e0f783addb2f8e2889360ecc1443acc1ca32f03158f8b459b14",
#   "sha256:03b1af2d2f1752f587c99bf9afca0a564054b79f46cf22cef211f86f1d4a4497",
#   "sha256:ae81327beceb885cbdb2663e2f89e6e55aaa614f5ce2d502f772420d6fe37f2f"
# ]

# 위의 Dockerfile을 사용해 Build 한 이미지의 Layer
docker inspect $MYUSER/pythonapp:latest | jq '.[].RootFS.Layers'
# [
#   "sha256:efbb01c414da9dbe80503875585172034d618260b0179622a67440af141ada49", # Base Layer
#   "sha256:0e770dacd8dd8e0f783addb2f8e2889360ecc1443acc1ca32f03158f8b459b14", # Base Layer
#   "sha256:03b1af2d2f1752f587c99bf9afca0a564054b79f46cf22cef211f86f1d4a4497", # Base Layer
#   "sha256:ae81327beceb885cbdb2663e2f89e6e55aaa614f5ce2d502f772420d6fe37f2f", # Base Layer
#   "sha256:dfc422e9754c1b15c721ee82bd1f11f3be96d3855ccda6a152a9f0b4f072cd8f", # Added Layer
#   "sha256:1672e8fee0e5c361034b2cd4fb6426f555dae546f9d82c16c354e279f7c70281", # Added Layer
#   "sha256:a3db286d0d13afc65be0047868891b9e794ba2804a2909e9127865a6695aa0a8", # Added Layer
#   "sha256:385b56145ab52a9e13062ebce5c206e0a1c89858c4cde4d5dabb3b02f1c70695"  # Added Layer
# ]
3.3. Build한 Container Image를 Docker Hub에 올린 뒤 실행 (Using Docker)
1
2
3
4
5
6
7
8
9
10
##############################################################
# 공개 레지스트리 로그인
##############################################################
docker login $MYREGISTRY # -u $MYUSER
# Login Succeeded

##############################################################
# 공개 레지스트리에 푸시
##############################################################
docker push $MYREGISTRY/$MYUSER/pythonapp:latest
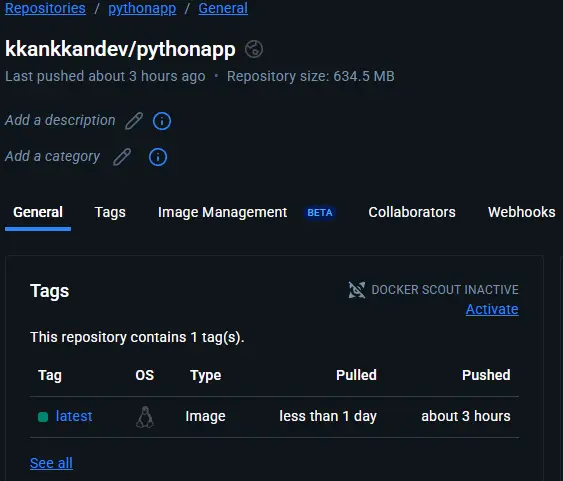
Docker Hub Python App Container Image 확인
1
2
3
4
5
6
7
8
9
10
11
12
13
14
15
16
17
18
19
20
21
22
23
24
25
26
27
28
29
30
31
32
33
##############################################################
# 공개 레지스트리에 이미지로 컨테이너 실행
##############################################################
docker run -d --name myweb -p 8080:8080 -it $MYREGISTRY/$MYUSER/pythonapp:latest

##############################################################
# Port-Forwarding 정보 확인
##############################################################
docker ps # port 정보 확인
# CONTAINER ID   IMAGE                          COMMAND                  CREATED             STATUS             PORTS                                                             NAMES
# c061433653b0   kkankkandev/pythonapp:latest   "python app.py"          4 seconds ago       Up 3 seconds       0.0.0.0:8080->8080/tcp, [::]:8080->8080/tcp                       myweb

##############################################################
# 접속 후 로그 확인
##############################################################
curl 127.0.0.1:8080
# Hello, World!

docker logs myweb
#  * Serving Flask app 'app'
#  * Debug mode: on
# WARNING: This is a development server. Do not use it in a production deployment. Use a production WSGI server instead.
#  * Running on all addresses (0.0.0.0)
#  * Running on http://127.0.0.1:8080
#  * Running on http://172.17.0.2:8080
# Press CTRL+C to quit
#  * Restarting with stat
#  * Debugger is active!
#  * Debugger PIN: 108-720-411
# 172.17.0.1 - - [18/Oct/2025 04:53:09] "GET / HTTP/1.1" 200 -

# 다음 실습을 위해 실행 중인 컨테이너 삭제
docker rm -f myweb
4. Docker가 필요 없는 Jib을 사용한 Container Image Build (dockerless)
Jib은 Google이 개발한 Dockerless 빌드 도구로, 로컬에 Docker Daemon을 설치하지 않아도 이미지를 만들 수 있습니다. Java 기반 애플리케이션을 대상으로 설계되어 Maven 또는 Gradle 플러그인으로 쉽게 통합할 수 있습니다. Jib은 애플리케이션을 직접 OCI 이미지 포맷으로 변환하여, CI/CD 환경에서도 Docker 설치 없이 레지스트리에 푸시할 수 있습니다. 즉, Jib은 Java 개발자에게 최적화된 Dockerless 이미지 빌드 솔루션입니다.
4.1. Docker가 필요 없는 Jib을 사용한 Container Image Build (dockerless) 빌드 흐름
Jib의 경우, 아래와 같이 Dockerfile이 필요 없이 Build 단계에서 Container Image Registry로 Container Image Push까지 처리합니다. 따라서 개발자의 경우 개발에만 집중 할 수 있다는 장점이 있습니다. 또한 애플리케이션을 종속 항목, 리소스, 클래스 등 별개의 레이어로 구성하고 Docker Image Layer Caching을 활용하며 변경사항만 다시 빌드함으로써, 빌드를 빠르게 유지합니다. Jib 레이어 구성과 작은 기본 이미지는 전체 이미지를 작게 유지하여 성능과 휴대성을 향상시킵니다.
Docker Build Workflow

Jib Build Workflow
4.2. Docker가 필요 없는 Jib을 사용한 Container Image Build (dockerless) 빌드 흐름 실습
1
2
3
4
5
6
7
8
9
10
11
12
13
14
15
16
17
18
19
20
21
22
23
24
25
26
27
28
29
30
31
32
33
34
35
36
37
38
39
40
41
42
43
44
45
46
47
48
49
50
51
52
53
54
55
56
57
58
59
60
61
62
63
64
65
66
67
68
69
70
71
72
73
74
75
76
77
78
79
80
81
82
83
84
85
86
87
88
89
90
91
92
93
94
95
96
97
98
99
100
101
102
103
104
105
106
107
108
109
110
111
112
113
114
115
116
117
118
119
120
121
122
123
##############################################################
# 실습 세팅
##############################################################
# 2. 실습 환경 준비 과정에서 생성한 kind-cluster의 worker node 접속
docker exec -it myk8s-worker bash

# openjdk 설치
apt update
mkdir -p /usr/share/man/man1
apt install perl-modules-5.36 -y
apt install openjdk-17-jdk -y

# java 버전 확인
java -version

# maven 설치
apt install maven -y

# maven 버전 확인
mvn -version

# 툴 설치
apt install git tree wget curl jq -y

# 소스 코드 가져오기
git clone https://github.com/gitops-cookbook/chapters
cd /chapters/chapters
tree

##############################################################
# Spring Boot Hello World Java Application 확인
##############################################################
# 현재 프로젝트 상태 확인 및 백업
cd ch03/springboot-app/
tree | tee -a before.txt

# docker 없음 확인
docker info
# bash: docker: command not found

##############################################################
# Spring Boot Application Maven Build (저장소 Push까지)
##############################################################

MYREGISTRY=docker.io
MYUSER=kkankkandev # 본인의 Docker Hub 계정명
MYPAT=<YOUR DOCKER HUB PERSONAL ACCESS TOKEN> # 본인의 Docker Hub Personal Access Token

# Maven Build (AMD64)
mvn compile com.google.cloud.tools:jib-maven-plugin:3.4.6:build \
  -Dimage=docker.io/$MYUSER/jib-example:latest \
  -Djib.to.auth.username=$MYUSER \
  -Djib.to.auth.password=$MYPAT \
  -Djib.from.platforms=linux/amd64

# ...
# Downloaded from central: https://repo.maven.apache.org/maven2/com/google/inject/guice/5.1.0/guice-5.1.0.jar (778 kB at 484 kB/s)
# [WARNING] 'mainClass' configured in 'maven-jar-plugin' is not a valid Java class: ${start-class}
# [INFO]
# [INFO] Containerizing application to kkankkandev/jib-example...
# [WARNING] Base image 'eclipse-temurin:11-jre' does not use a specific image digest - build may not be reproducible
# [INFO] Using credentials from <to><auth> for kkankkandev/jib-example
# [INFO] The base image requires auth. Trying again for eclipse-temurin:11-jre...
# [INFO] Using base image with digest: sha256:12e6611e8bdd47af0a12574f69c178745b09998459ccbac2ec2b08e837bce1a7
# [INFO]
# [INFO] Container entrypoint set to [java, -cp, @/app/jib-classpath-file, com.redhat.hello.HelloApplication]
# [INFO]
# [INFO] Built and pushed image as kkankkandev/jib-example
# [INFO] Executing tasks:
# [INFO] [============================  ] 91.7% complete
# [INFO] > launching layer pushers
# [INFO]
# [INFO] ------------------------------------------------------------------------
# [INFO] BUILD SUCCESS
# [INFO] ------------------------------------------------------------------------
# [INFO] Total time:  01:09 min
# [INFO] Finished at: 2025-10-18T07:57:46Z
# [INFO] ------------------------------------------------------------------------

# 확인
diff before.txt after.txt
# ...
# > `-- target
# >     |-- classes
# >     |   |-- application.properties
# >     |   `-- com
# >     |       `-- redhat
# >     |           `-- hello
# >     |               |-- Greeting.class
# >     |               |-- GreetingController.class
# >     |               `-- HelloApplication.class
# >     |-- generated-sources
# >     |   `-- annotations
# >     |-- jib-cache
# >     |   |-- jib-classpath-file
# >     |   |-- jib-main-class-file
# >     |   |-- layers
# >     |   |   |-- 6d6cf0398708e59e5a4e91e9f666d82687b54231c18464f6fa4374c545950561
# >     |   |   |   `-- 19453caec741a081acf3685cfd1cd9b92b8bb6685a7154c3a154fb5192796338
# >     |   |   |-- 80179ad604dc1a50d17a7522de854594aadb14ea38cb15e5036b52e9df65d580
# >     |   |   |   `-- 32aa8a1c89daefa50dd23dc2f178889e2008f5e7f08c380263798f95b8ea23b6
# >     |   |   |-- d2bcf32f8182a5ac9249f422ea33e6330258546e9795099d154e09f073108a9b
# >     |   |   |   `-- 12f836f93b6bb6fc700bee8bab11f19b8737647d247545568f2e35d99f74ba65
# >     |   |   `-- d3589b3a4a640a631770abb1568e2c8fa9af3826b67fc08991e0be6dfdae81f2
# >     |   |       `-- d0047b3741306dc4c7234a4cc69d9f972160b76ca8cbe2774660913604bfff29
# >     |   |-- selectors
# >     |   |   |-- 8ffde4db562219085ea5bc936ef048ce4ff7fc722cf81cde44b286201e01e77f
# >     |   |   |-- bffc6c3e0b44f3f43041a5456dc4bf11ba538918674e948cb5504f680773a6d3
# >     |   |   |-- d6a0f0cfe1164649bef6da55c80f430fe8b286bf933312975ee3adb6906a2ddb
# >     |   |   `-- deaaee2fbf15e0958437efe60b935cfc0e9f8db08ed4507b723173a8100f47e1
# >     |   `-- tmp
# >     |-- jib-image.digest
# >     |-- jib-image.id
# >     |-- jib-image.json
# >     `-- maven-status
# >         `-- maven-compiler-plugin
# >             `-- compile
# >                 `-- default-compile
# >                     |-- createdFiles.lst
# >                     `-- inputFiles.lst

# 빠져나오기
exit
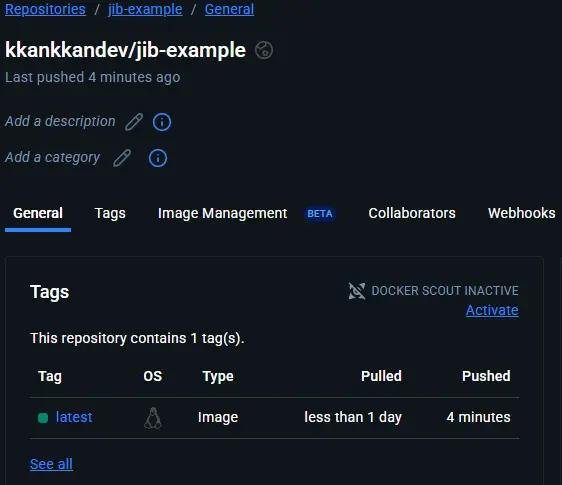
4.3. Build한 Container Image를 Docker Hub에 올린 뒤 실행 (Using Jib)
1
2
3
4
5
6
7
8
9
10
11
12
13
14
15
16
17
18
19
20
21
22
23
24
25
26
##############################################################
# 컨테이너 기동
##############################################################
docker run -d --name myweb2 -p 8080:8080 -it docker.io/kkankkandev/jib-example
docker ps | grep myweb2
# efa4996b2830   kkankkandev/jib-example   "java -cp @/app/jib-…"   45 seconds ago   Up 44 seconds   0.0.0.0:8080->8080/tcp, [::]:8080->8080/tcp                       myweb2

##############################################################
# 호출 확인
##############################################################
curl -s 127.0.0.1:8080/hello | jq
# {
#   "id": 1,
#   "content": "Hello, World!"
# }

##############################################################
# 이미지 확인
##############################################################
docker images
docker inspect kkankkandev/jib-example | jq

##############################################################
# 다음 실습을 위해 컨테이너 삭제
##############################################################
docker rm -f myweb2
5. Buildah를 사용한 Container Image Build (daemonless)
Buildah는 Red Hat이 개발한 Daemonless 빌드 도구로, 백그라운드 프로세스 없이 직접 컨테이너 이미지를 생성할 수 있습니다. 특정 언어나 SDK에 종속되지 않으며, 명령형 CLI를 통해 이미지의 각 단계를 세밀하게 제어할 수 있습니다. buildah bud 명령을 사용하면 기존 Dockerfile로도 이미지를 빌드할 수 있습니다. Rootless 모드를 지원하므로 CI/CD나 보안이 중요한 환경에서 자주 사용됩니다.
또한 Buildah는 Container Image를 처음부터 새로 만들 수도 있고, Dockerfile에서 생성할 수도 있습니다. 또한 Buildah는 Container Image를 밑바닥부터 새로 만드는 기능을 지원하므로, Dockerfile의 From scratch 실행 결과 와 비슷한 빈 레이어를 생성 할 수 있습니다. 해당 기능은 아래 그림과 같이 Application을 실행하는데 필요한 패키지만 포함하는 매우 가벼운 이미지를 만드는 데 유용합니다.
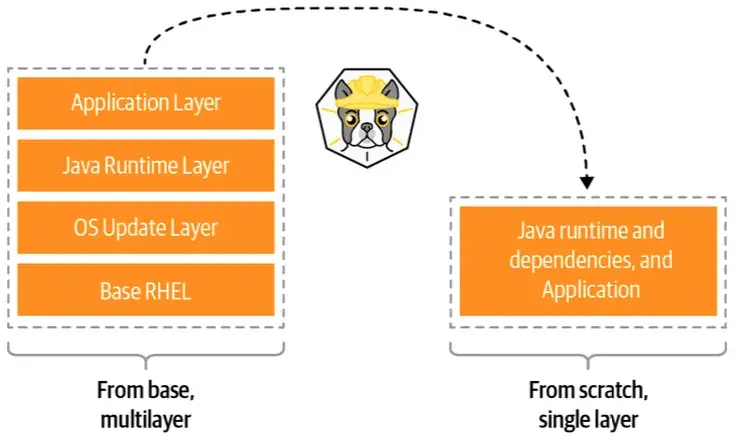
O’Reilly GitOps Cookbook: Kubernetes Automation in Practice
Container Image Layers - 3.3. 빌다를 사용한 컨테이너 빌드 p.40
- Buildah 설치 방법 - https://github.com/containers/buildah/blob/main/install.md
5.1. Buildah를 사용한 Container Image Build 실습
1
2
3
4
5
6
7
8
9
10
11
12
13
14
15
16
17
18
19
20
21
22
23
24
25
26
27
28
29
30
31
32
33
34
35
36
37
38
39
40
41
42
43
44
45
46
47
48
49
50
51
52
53
54
55
56
57
58
59
60
61
62
63
64
65
66
67
68
69
70
71
72
73
74
75
76
77
78
79
80
81
82
83
84
85
86
87
88
89
90
91
92
93
94
95
96
97
98
99
100
101
102
103
104
105
106
107
108
109
110
111
112
113
114
115
116
117
118
119
120
121
122
123
124
125
126
127
128
129
130
131
132
133
134
135
136
137
138
139
140
141
142
143
144
145
146
147
148
149
150
151
152
153
154
155
156
##############################################################
# 실습 세팅
##############################################################
# 2. 실습 환경 준비 과정에서 생성한 kind-cluster의 worker node 접속
docker exec -it myk8s-worker bash

# Buildah 설치 및 확인
apt-get -y update
mkdir -p /usr/share/man/man1
apt-get -y install podman

# podman 확인
podman version
podman info
podman images
podman ps

# buildah 설치 확인 : podman 설치 시 같이 설치됨
apt install buildah -y
buildah version
buildah info
buildah images
buildah containers

##############################################################
# buildah 이미지 Build
##############################################################

# 새로운 작업 컨테이너 생성
buildah from centos:latest
# Resolved "centos" as an alias (/etc/containers/registries.conf.d/shortnames.conf)
# Trying to pull quay.io/centos/centos:latest...
# Getting image source signatures
# Copying blob bf573055768d done
# Copying config 4fbde73dcc done
# Writing manifest to image destination
# Storing signatures
# centos-working-container

# 공통 확인
podman ps -a
# CONTAINER ID  IMAGE       COMMAND     CREATED     STATUS      PORTS       NAMES

buildah images
# REPOSITORY              TAG      IMAGE ID       CREATED      SIZE
# quay.io/centos/centos   latest   4fbde73dcc66   4 days ago   316 MB

podman images
# REPOSITORY             TAG         IMAGE ID      CREATED     SIZE
# quay.io/centos/centos  latest      4fbde73dcc66  4 days ago  316 MB

buildah containers
# CONTAINER ID  BUILDER  IMAGE ID     IMAGE NAME                       CONTAINER NAME
# d7c14c6d5c48     *     4fbde73dcc66 quay.io/centos/centos:latest     centos-working-container

# 작업 컨테이너 정보 확인
buildah inspect quay.io/centos/centos | jq

# 위에서 만든 Build 전용 컨테이너에 httpd 패키지 레이어 추가
buildah run centos-working-container yum install httpd -y

# index.html 파일 작성
cat << EOF > index.html
<html>
    <head>
        <title>Cloudneta CICD Study</title>
    </head>
    <body>
        <h1>Hello, World!</h1>
    </body>
</html>
EOF

# 새 레이어에 파일 추가 : 새 레이어가 추가될 때마다 아래 처럼 이미지 해시 출력
buildah copy centos-working-container index.html /var/www/html/index.html
# 8440a1923c28a8191233d25ccf21579a7a5131276655466471d6a22ce4962a79

# 컨테이너가 실행될 때 자동으로 실행할 프로세스를 설정
buildah config --entrypoint "/usr/sbin/httpd -DFOREGROUND" centos-working-container

# 이미지 생성 및 태그 지정 (현재 작업 컨테이너를 새 이미지로 커밋(commit))
buildah commit centos-working-container docker.io/kkankkandev/gitops-website
# Getting image source signatures
# Copying blob 288e9c66457d skipped: already exists
# Copying blob 977a6f2d4b81 done
# Copying config 6401a57dd8 done
# Writing manifest to image destination
# Storing signatures
# 6401a57dd8b419e72baf1d1978c92f20a080921cf8a8fe22e9d556d674961698

##############################################################
# 위에서 생성한 podman 실행 확인
##############################################################
buildah containers
# CONTAINER ID  BUILDER  IMAGE ID     IMAGE NAME                       CONTAINER NAME
# d7c14c6d5c48     *     4fbde73dcc66 quay.io/centos/centos:latest     centos-working-container

podman ps -a
# CONTAINER ID  IMAGE       COMMAND     CREATED     STATUS      PORTS       NAMES

buildah images && podman images
# REPOSITORY                             TAG      IMAGE ID       CREATED              SIZE
# docker.io/kkankkandev/gitops-website   latest   6401a57dd8b4   About a minute ago   361 MB
# quay.io/centos/centos                  latest   4fbde73dcc66   4 days ago           316 MB
# REPOSITORY                            TAG         IMAGE ID      CREATED             SIZE
# docker.io/kkankkandev/gitops-website  latest      6401a57dd8b4  About a minute ago  361 MB
# quay.io/centos/centos                 latest      4fbde73dcc66  4 days ago          316 MB

# podman으로 위 컨테이너 이미지 실행
podman run --runtime /usr/local/sbin/runc -d --name myweb -p 8080:80 -it docker.io/kkankkandev/gitops-website

# 확인
podman ps
# CONTAINER ID  IMAGE                                        COMMAND     CREATED        STATUS            PORTS                 NAMES
# 3e95ff83fb06  docker.io/kkankkandev/gitops-website:latest  /bin/bash   3 seconds ago  Up 3 seconds ago  0.0.0.0:8080->80/tcp  myweb

curl -s 127.0.0.1:8080
# <html>
#     <head>
#         <title>Cloudneta CICD Study</title>
#     </head>
#     <body>
#         <h1>Hello, World!</h1>
#     </body>
# </html>

crictl ps
# CONTAINER           IMAGE               CREATED             STATE               NAME                ATTEMPT             POD ID              POD                 NAMESPACE
# 8a4ccc52615f1       409467f978b4a       11 hours ago        Running             kindnet-cni         0                   8cabcf5759252       kindnet-hq2qh       kube-system
# 045aa808ac3be       d7b94972d43c5       11 hours ago        Running             kube-proxy          0                   7f5d092d90d64       kube-proxy-sd6nq    kube-system

crictl images
# IMAGE                                           TAG                  IMAGE ID            SIZE
# docker.io/kindest/kindnetd                      v20250512-df8de77b   409467f978b4a       44.4MB
# docker.io/kindest/local-path-helper             v20241212-8ac705d0   baa0d31514ee5       3.08MB
# docker.io/kindest/local-path-provisioner        v20250214-acbabc1a   bbb6209cc873b       22.5MB
# registry.k8s.io/coredns/coredns                 v1.11.3              c69fa2e9cbf5f       18.6MB
# registry.k8s.io/etcd                            3.5.16-0             a9e7e6b294baf       57.7MB
# registry.k8s.io/kube-apiserver-amd64            v1.32.8              0d4edaa48e2f9       98.1MB
# registry.k8s.io/kube-apiserver                  v1.32.8              0d4edaa48e2f9       98.1MB
# registry.k8s.io/kube-controller-manager-amd64   v1.32.8              b248d0b0c74ad       90.8MB
# registry.k8s.io/kube-controller-manager         v1.32.8              b248d0b0c74ad       90.8MB
# registry.k8s.io/kube-proxy-amd64                v1.32.8              d7b94972d43c5       95.3MB
# registry.k8s.io/kube-proxy                      v1.32.8              d7b94972d43c5       95.3MB
# registry.k8s.io/kube-scheduler-amd64            v1.32.8              2ac266f06c9a5       70.7MB
# registry.k8s.io/kube-scheduler                  v1.32.8              2ac266f06c9a5       70.7MB
# registry.k8s.io/pause                           3.10                 873ed75102791       320kB

##############################################################
# 다음 실습을 위해 컨테이너 삭제
##############################################################
podman rm -f myweb
podman ps

buildah rm --all
buildah rmi --all
5.2. Dockerfile로 buildah 이미지 빌드 실습
1
2
3
4
5
6
7
8
9
10
11
12
13
14
15
16
17
18
19
20
21
22
23
24
25
26
27
28
29
30
31
32
33
34
##############################################################
# 실습 세팅
##############################################################
# 2. 실습 환경 준비 과정에서 생성한 kind-cluster의 worker node 접속
docker exec -it myk8s-worker bash

# Dockerfile 생성
cat << EOF > Dockerfile
FROM centos:latest
RUN yum -y install httpd
COPY index.html /var/www/html/index.html
EXPOSE 80
CMD ["/usr/sbin/httpd", "-DFOREGROUND"]
EOF

##############################################################
# 위에서 생성한 Dockerfile로 buildah 이미지 빌드
##############################################################
buildah build -f Dockerfile -t docker.io/kkankkandev/gitops-website

# 확인
buildah containers
# CONTAINER ID  BUILDER  IMAGE ID     IMAGE NAME                       CONTAINER NAME

podman ps -a
# CONTAINER ID  IMAGE       COMMAND     CREATED     STATUS      PORTS       NAMES

buildah images && podman images
REPOSITORY                             TAG      IMAGE ID       CREATED          SIZE
docker.io/kkankkandev/gitops-website   latest   7d42b2d970e6   15 seconds ago   361 MB
quay.io/centos/centos                  latest   4fbde73dcc66   4 days ago       316 MB
REPOSITORY                            TAG         IMAGE ID      CREATED         SIZE
docker.io/kkankkandev/gitops-website  latest      7d42b2d970e6  15 seconds ago  361 MB
quay.io/centos/centos                 latest      4fbde73dcc66  4 days ago      316 MB
5.3. Buildah로 빌드한 Container Image를 저장소에 push
1
2
3
4
5
6
7
8
9
10
11
# push help
Examples:
  buildah push imageID docker://registry.example.com/repository:tag
  buildah push imageID docker-daemon:image:tagi
  buildah push imageID oci:/path/to/layout:image:tag

# 저장소 로그인
buildah login --username kkankkandev docker.io

# 저장소 push
buildah push docker.io/kkankkandev/gitops-website docker.io/kkankkandev/gitops-website
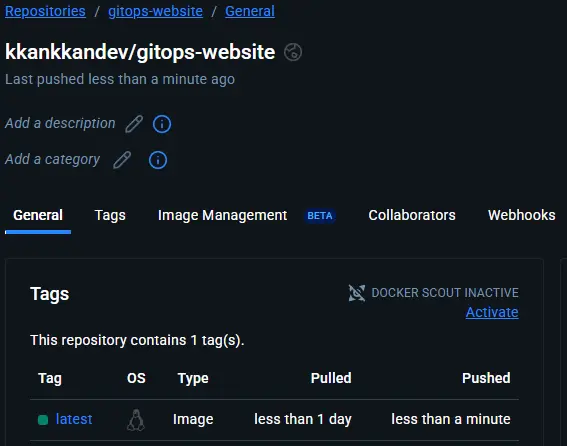
Buildah Container Image Check
6. Buildpack을 사용한 Container Image Build (daemonless)
Buildpack는 소스 코드를 분석하여 자동으로 컨테이너 이미지를 만들어주는 Daemonless 도구입니다. Dockerfile 없이도 동작하며, 언어별 런타임과 빌드 도구를 자동으로 감지합니다. 원래 Heroku에서 시작되어 Cloud Native Buildpack (CNB) 로 발전했으며, 현재 Google, VMware, Salesforce 등이 주도하고 있습니다. 대표 구현체로는 Paketo Buildpack와 Google Buildpack가 있습니다. Buildpack은 개발자가 Dockerfile을 직접 작성하지 않아도 되므로 개발 생산성 향상에 큰 도움이 됩니다.
Buildpack은 Dockerfile 없이도 Application Source에서 OCI 호환 컨테이너 이미지를 생성할 수 있습니다.
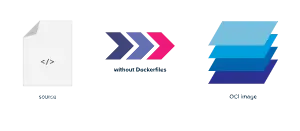
Buildpack.io - What is a buildpack?
Buildpack Overview
6.1. Buildpack Mechanism
Buildpack은 Mechanism은 아래 두 단계로 구성됩니다.
- 탐지 Detection
- Buildpack은 소스 코드를 탐색하여 어떤 프로그래밍 언어 또는 프레임워크가 사용되는지 파악하고 (가령 POM, NPM 파일, Python requirements 등) 해당 소스 코드 빌드에 가장 적합한 Buildpack을 선정한다.
- 빌드 Building
- 일단 Buildpack이 결정되면 소스는 컴파일되고, Buildpack은 적절한 진입점 entrypoint 과 시작 스크립트 startup scripts 가 포함된 컨테이너 이미지를 만든다.
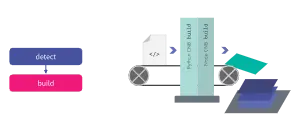
Buildpack.io - What is a buildpack?
Buildpack Mechanism

Build Pack - Builder
6.2. Buildpack 실습
1
2
3
4
5
6
7
8
9
10
11
12
13
14
15
16
17
18
19
20
21
22
23
24
25
26
27
28
29
30
31
32
33
34
35
36
37
38
39
40
41
42
43
44
45
46
47
48
49
50
51
52
53
54
55
56
57
58
59
60
61
62
63
64
65
66
67
68
69
70
71
72
73
74
75
76
77
78
79
80
81
82
83
84
85
86
87
88
89
90
91
92
93
94
95
96
97
98
99
##############################################################
# 실습 세팅
##############################################################
# Buildpack 설치
brew install buildpacks/tap/pack

# 설치 확인
which pack
pack version
pack --help

##############################################################
# Sample Node Application에서 Buildpack을 사용해 Container Image Build
##############################################################
# 소스 코드 확인
cd chapters/chapters/ch03/nodejs-app/
tree
# .
# ├── package-lock.json
# ├── package.json
# └── server.js

## 이 빌드에 필요한 Node.js 패키지를 나열하는 매니페스트 파일 확인 : 어떤 빌드팩을 사용할지 파악하는데 도움이 됨.
cat package.json | jq
# {
#   "name": "nodejs-app",
#   "version": "1.0.0",
#   "description": "Example app with Node.JS",
#   "main": "index.js",
#   "scripts": {
#     "test": "echo \"Error: no test specified\" && exit 1"
#   },
#   "repository": {
#     "type": "git",
#     "url": "https://github.com/gitops-cookbook"
#   },
#   "keywords": [
#     "gitops",
#     "cookbook"
#   ],
#   "author": "Natale Vinto",
#   "license": "GPL-3.0"
# }

# List the recommended builders 확인
pack builder suggest
# Suggested builders:
# 	Google:                gcr.io/buildpacks/builder:google-22                     Ubuntu 22.04 base image with buildpacks for .NET, Dart, Go, Java, Node.js, PHP, Python, and Ruby
# 	Heroku:                heroku/builder:24                                       Ubuntu 24.04 AMD64+ARM64 base image with buildpacks for .NET, Go, Java, Node.js, PHP, Python, Ruby & Scala.
# 	Paketo Buildpacks:     paketobuildpacks/builder-jammy-base                     Ubuntu 22.04 Jammy Jellyfish base image with buildpacks for Java, Go, .NET Core, Node.js, Python, Apache HTTPD, NGINX and Procfile
# 	Paketo Buildpacks:     paketobuildpacks/builder-jammy-buildpackless-static     Static base image (Ubuntu Jammy Jellyfish build image, distroless-like run image) with no buildpacks included. To use, specify buildpacks at build time.
# 	Paketo Buildpacks:     paketobuildpacks/builder-jammy-full                     Ubuntu 22.04 Jammy Jellyfish full image with buildpacks for Apache HTTPD, Go, Java, Java Native Image, .NET, NGINX, Node.js, PHP, Procfile, Python, and Ruby
# 	Paketo Buildpacks:     paketobuildpacks/builder-jammy-tiny                     Tiny base image (Ubuntu Jammy Jellyfish build image, distroless-like run image) with buildpacks for Java, Java Native Image and Go
# 	Paketo Buildpacks:     paketobuildpacks/builder-ubi8-base                      Ubi 8 base builder with buildpacks for Node.js, Java, Quarkus and Procfile

## Tip: Learn more about a specific builder with: pack builder inspect <builder-image>
pack builder inspect paketobuildpacks/builder-jammy-base
pack builder inspect heroku/builder:24

# 빌드 전 확인
docker images
# REPOSITORY     TAG       IMAGE ID       CREATED       SIZE
# kindest/node   v1.32.8   abd489f042d2   7 weeks ago   1.5GB

# Container Image Build
pack build nodejs-app --builder paketobuildpacks/builder-jammy-base

##############################################################
# 빌드된 이미지 확인 및 실행, 환경 정리
##############################################################
# 이미지 확인
docker images
# REPOSITORY                            TAG       IMAGE ID       CREATED        SIZE
# paketobuildpacks/run-jammy-base       latest    d3fb70c7b483   36 hours ago   175MB
# kindest/node                          v1.32.8   abd489f042d2   7 weeks ago    1.5GB
# nodejs-app                            latest    6cdaa656d0d3   45 years ago   724MB
# paketobuildpacks/builder-jammy-base   latest    fc0d0baa5a08   45 years ago   3.75GB
docker inspect nodejs-app | jq

# 컨테이너 실행
docker run -d --name myapp --rm -p 3000:3000 nodejs-app
# c0915a7275e8ddd65521e9f6b04735b96413d21e913d679f390456f89d98c302
docker ps | grep myapp
# c0915a7275e8   nodejs-app             "/cnb/process/web"       17 seconds ago   Up 17 seconds   0.0.0.0:3000->3000/tcp, [::]:3000->3000/tcp                       myapp

# 호출 확인
curl -s 127.0.0.1:3000
# Hello Buildpacks!

# 다음 실습을 위해 삭제
docker rm -f myapp

# 환경 정리 삭제 시
brew uninstall pack
brew untap buildpacks/tap  # optional
rm -rf ~/.pack
brew cleanup

docker rmi -f $(docker images -aq) 2>/dev/null || true
7. Shipwright와 Kaniko를 사용한 Kubernetes 기반 Container Image Build
Kubernetes는 기본적으로 이미지 빌드 기능을 내장하고 있지 않지만, 외부 도구와 연동하여 빌드 기능을 확장할 수 있습니다. Shipwright는 Kubernetes에서 컨테이너 이미지를 빌드하기 위한 오픈 소스 프레임워크로, 다양한 빌드 엔진을 추상화 계층(abstraction layer) 으로 통합합니다. 내부적으로 Kaniko, Buildah, Buildpack 등을 백엔드 빌더로 활용할 수 있습니다. 특히 Kaniko는 Pod 내에서 Docker Daemon 없이(Daemonless) 이미지를 빌드할 수 있어, 완전한 클라우드 네이티브 빌드 환경을 제공합니다.
7.1. Shipwright 과제 및 풀이
- 과제
- 컨테이너 이미지를 생성해야 하는데, 이 작업을 쿠버네티스로 실행해 보자
- 풀이
- 쿠버네티스는 컨테이너 이미지를 빌드하는 기능을 제공하지 않는다.
- 그리하여 널리 사용되는 방안은 CI/CD 시스템을 사용하는 것이다. 또 다른 방안은 빌드 관리 프레임워크를 사용하는 것이다. 그중 하나가 Shipwright.
- 십라이트 Shipwright는 쿠버네티스에서 컨테이너 이미지를 빌드하는 확장 가능 프레임워크다 - Home , Intro
- 빌다 Buildah , 빌드팩 Buildpacks ,
카니코 kaniko같은 유명 도구를 지원한다. - 이 프레임워크는 쿠버네티스 스타일 API를 사용하여, 텍톤 Tekton 위에서 작업을 실행한다.
- 개발자 입장에서는 컨테이너 또는 컨테이너 엔진에 대한 사전 지식 없이도 YAML 파일만 정의하면 컨테이너 이미지를 빌드할 수 있다.
- 특정 솔루션에 종속되지 않으며, 쿠버네티스 API 에코시스템과 잘 어울린다.
7.2. Shipwright Supported platforms
Shipwright를 설치한 후에는 다음 도구 중 하나로 컨테이너 이미지 생성을 시작해 볼 수 있습니다.
| Name | Supported platforms |
|---|---|
| buildah | all |
| multiarch-native-buildah | all |
| BuildKit | all |
| buildpacks-v3-heroku | linux/amd64 only |
| buildpacks-v3 | linux/amd64 only |
| kaniko | all |
| ko | all |
| source-to-image | linux/amd64 only |
7.3. kind Kubernetes에 Shipwright 설치
1
2
3
4
5
6
7
8
9
10
11
12
13
14
15
16
17
18
19
20
21
22
23
24
25
26
27
28
29
30
31
32
33
34
35
36
37
38
39
40
41
42
43
44
45
46
47
48
49
50
51
52
53
54
55
56
57
58
59
# Tekton dependency 파이프라인(pipeline) 설치 : ~0.61.0 ErrImagePull
## https://tekton.dev/docs/getting-started/pipelines/
## https://github.com/tektoncd/pipeline , 현재 v1.5.0
kubectl apply -f https://storage.googleapis.com/tekton-releases/pipeline/previous/v0.70.0/release.yaml

# Tekton dependency 파이프라인(pipeline) 설치 확인
kubectl get crd
# NAME                                       CREATED AT
# clustertasks.tekton.dev                    2025-10-18T16:14:51Z
# customruns.tekton.dev                      2025-10-18T16:14:51Z
# pipelineruns.tekton.dev                    2025-10-18T16:14:51Z
# pipelines.tekton.dev                       2025-10-18T16:14:51Z
# resolutionrequests.resolution.tekton.dev   2025-10-18T16:14:51Z
# stepactions.tekton.dev                     2025-10-18T16:14:51Z
# taskruns.tekton.dev                        2025-10-18T16:14:51Z
# tasks.tekton.dev                           2025-10-18T16:14:51Z
# verificationpolicies.tekton.dev            2025-10-18T16:14:51Z

kubectl get ns | grep tekton
# tekton-pipelines             Active   13s
# tekton-pipelines-resolvers   Active   12s

kubectl get-all -n tekton-pipelines # kubectl krew install get-all
kubectl get all -n tekton-pipelines
kubectl get-all -n tekton-pipelines-resolvers
kubectl get all -n tekton-pipelines-resolvers
kubectl get mutatingwebhookconfigurations,validatingwebhookconfigurations
kubectl get mutatingwebhookconfigurations,validatingwebhookconfigurations -o yaml

## SA 에 role 맵핑 정보 확인
kubectl get sa -n tekton-pipelines
kubectl rolesum -n tekton-pipelines tekton-pipelines-controller # kubectl krew install rolesum
kubectl rolesum -n tekton-pipelines tekton-pipelines-webhook
kubectl rolesum -n tekton-pipelines tekton-events-controller

kubectl get sa -n tekton-pipelines-resolvers
kubectl rolesum -n tekton-pipelines-resolvers tekton-pipelines-resolvers


# Shipwright Builds Directly 설치 : 현재 v0.17.0
kubectl apply -f https://github.com/shipwright-io/build/releases/download/v0.11.0/release.yaml

# Shipwright Builds 설치 확인
kubectl get crd | grep shipwright
# buildruns.shipwright.io                    2025-10-18T16:17:21Z
# builds.shipwright.io                       2025-10-18T16:17:21Z
# buildstrategies.shipwright.io              2025-10-18T16:17:21Z
# clusterbuildstrategies.shipwright.io       2025-10-18T16:17:21Z

kubectl explain builds.shipwright.io
kubectl explain builds.shipwright.io.spec
...

kubectl get-all -n shipwright-build
kubectl get all -n shipwright-build


# Shipwright build strategies 빌드 전략 설치
kubectl apply -f https://github.com/shipwright-io/build/releases/download/v0.11.0/sample-strategies.yaml
7.4. (참고) Shipwright Builds Directly 0.12.0 이상 직접 설치 시 : webhook 파드에 인증서 정보가 담긴 Secret 필요
1
2
3
4
5
6
7
8
9
10
11
12
13
14
15
16
#
openssl req -x509 -newkey rsa:4096 -sha256 -days 365 \
  -nodes -keyout webhook.key -out webhook.crt \
  -subj "/CN=shipwright-build-webhook.shipwright-build.svc"

kubectl create secret tls shipwright-build-webhook-cert \
  --cert=webhook.crt \
  --key=webhook.key \
  -n shipwright-build

#
kubectl create -f https://github.com/shipwright-io/build/releases/download/v0.12.0/release.yaml --save-config=false

# webhook 파드에 인증서 정보가 담긴 Secret 필요
kubectl get-all -n shipwright-build
**kubectl get all -n shipwright-build**
7.5. CRD를 통해 제공되는 Shipwright APIs
- ClusterBuildStrategy
- 실행할 빌드 유형
- Build
- 빌드를 나타낸다. 하나의 ClusterBuildStrategy 객체가 포함된다.
- BuildRun
- 실행 중인 빌드를 나타낸다. 이 객체가 생성되면 빌드가 시작된다.
사용 가능한 모든 ClusterBuildStrategy 객체 목록 확인
1
2
3
4
5
6
7
8
9
10
11
12
13
14
15
16
17
18
19
20
21
22
23
# Shipwright build strategies 빌드 전략 확인
**kubectl get clusterbuildstrategy**
NAME                     AGE
buildah                  15s
buildkit                 15s
buildpacks-v3            15s
buildpacks-v3-heroku     15s
kaniko                   15s
kaniko-trivy             15s
ko                       15s
source-to-image          15s
source-to-image-redhat   15s

kubectl get clusterbuildstrategy **buildah** -o yaml
...
    image: quay.io/containers/**buildah:v1.27.0**
    name: build-and-push
...

kubectl get clusterbuildstrategy **buildkit** -o yaml
...
    image: moby/**buildkit:nightly-rootless**
...
7.6. Shipwright를 사용한 Container Image Build 및 Push
Shipwright는 쿠버네티스 노드의 Container Cache에 Container Image를 생성합니다. 또한 빌드한 Container Image를 Container Registry로 푸시할 수도 있습니다.
1
2
3
4
5
6
7
8
9
10
11
12
13
14
15
16
17
18
19
20
21
22
23
24
25
26
27
28
29
30
31
32
33
34
35
36
37
38
39
40
41
42
43
44
45
46
47
48
49
50
51
52
53
54
55
56
57
58
59
60
61
62
63
64
65
66
67
68
69
70
71
72
73
74
75
76
77
78
79
80
81
82
83
84
85
86
87
88
89
90
91
92
93
94
95
96
97
98
99
100
101
102
103
104
105
106
107
108
109
110
111
112
113
114
115
116
117
118
119
120
121
122
123
124
125
126
127
128
129
130
131
132
133
##############################################################
# Docker Hub 접근을 위한 Kubernetes Secret 생성
##############################################################
# 변수 지정 : 각자 자신의 저장소 계정 정보 사용
REGISTRY_SERVER=https://index.docker.io/v1/
REGISTRY_USER=kkankkandev
REGISTRY_PASSWORD=<your_registry_password>
EMAIL=xowl5460@naver.com
# 시크릿 생성
kubectl create secret docker-registry push-secret \
--docker-server=$REGISTRY_SERVER \
--docker-username=$REGISTRY_USER \
--docker-password=$REGISTRY_PASSWORD \
--docker-email=$EMAIL
# 시크릿 확인
kubectl get secret
NAME TYPE DATA AGE
push-secret kubernetes.io/dockerconfigjson 1 5s
##############################################################
# Kanico가 Golang Smaple Application을 컨테이너화 할 때 사용할, Build 객체 생성
##############################################################
# Build 객체 생성
cat <<EOF | kubectl apply -f -
apiVersion: shipwright.io/v1alpha1
kind: Build
metadata:
name: kaniko-golang-build
spec:
source:
url: https://github.com/shipwright-io/sample-go # 소스 코드를 가져올 저장소
contextDir: docker-build # 소스 코드가 있는 디렉터리
strategy:
name: kaniko # 빌드에 사용할 ClusterBuildStrategy 이름
kind: ClusterBuildStrategy
dockerfile: Dockerfile
output:
image: docker.io/$REGISTRY_USER/sample-golang:latest # 결과 이미지를 저장할 장소
credentials:
name: push-secret # 레지스트리에 인증하고 이미지를 푸시하는 데 사용할 시크릿 이름
EOF
# 확인
kubectl get builds kaniko-golang-build -o yaml
kubectl get builds
# NAME REGISTERED REASON BUILDSTRATEGYKIND BUILDSTRATEGYNAME CREATIONTIME
# kaniko-golang-build True Succeeded ClusterBuildStrategy kaniko 5s
##############################################################
# 위에서 생성한 Build 객체를 기반으로 Build Run
##############################################################
# 파일 작성
cat << EOF > buildrun-go.yaml
apiVersion: shipwright.io/v1alpha1
kind: BuildRun
metadata:
generateName: kaniko-golang-buildrun-
spec:
buildRef:
name: kaniko-golang-build
EOF
cat buildrun-go.yaml
# 신규 터미널 : 파드 상태 모니터링
kubectl get pod -n default -w
kaniko-golang-buildrun-jz5cg-ck5p4-pod 0/3 Init:0/2 0 0s
kaniko-golang-buildrun-jz5cg-ck5p4-pod 0/3 Init:1/2 0 1s
kaniko-golang-buildrun-jz5cg-ck5p4-pod 0/3 PodInitializing 0 2s
kaniko-golang-buildrun-jz5cg-ck5p4-pod 3/3 Running 0 4s
kaniko-golang-buildrun-jz5cg-ck5p4-pod 3/3 Running 0 4s
kaniko-golang-buildrun-jz5cg-ck5p4-pod 2/3 NotReady 0 7s
kaniko-golang-buildrun-jz5cg-ck5p4-pod 0/3 Completed 0 66s
kaniko-golang-buildrun-jz5cg-ck5p4-pod 0/3 Completed 0 67s
# 빌드 수행 : 완료까지 대략 1분 정도 소요
kubectl create -f buildrun-go.yaml
# 파드 로깅 확인
k9s -> pod -> l (옵션 f, w, t)
stream closed: EOF for default/kaniko-golang-buildrun-jz5cg-ck5p4-pod (working-dir-initializer)
step-source-default 2025/10/12 02:35:06 Info: ssh (/usr/bin/ssh): OpenSSH_8.0p1, OpenSSL 1.1.1k FIPS 25 Mar 2021
step-source-default 2025/10/12 02:35:06 Info: git (/usr/bin/git): git version 2.31.1
step-source-default 2025/10/12 02:35:06 Info: git-lfs (/usr/bin/git-lfs): git-lfs/2.13.3 (GitHub; linux arm64; go 1.17.5)
step-source-default 2025/10/12 02:35:06 /usr/bin/git clone -h
step-source-default 2025/10/12 02:35:06 /usr/bin/git submodule -h
step-source-default 2025/10/12 02:35:06 /usr/bin/git clone --quiet --no-tags --single-branch --depth 1 -- https://github.com/shipwright-io/sample-go /
workspace/source
stream closed: EOF for default/kaniko-golang-buildrun-jz5cg-ck5p4-pod (prepare)
step-source-default 2025/10/12 02:35:06 /usr/bin/git -C /workspace/source submodule update --init --recursive --depth 1
step-source-default 2025/10/12 02:35:07 /usr/bin/git -C /workspace/source rev-parse --abbrev-ref HEAD
step-source-default 2025/10/12 02:35:07 Successfully loaded https://github.com/shipwright-io/sample-go (main) into /workspace/source
step-source-default 2025/10/12 02:35:07 /usr/bin/git -C /workspace/source rev-parse --verify HEAD
step-source-default 2025/10/12 02:35:07 /usr/bin/git -C /workspace/source log -1 --pretty=format:%an
step-source-default 2025/10/12 02:35:07 /usr/bin/git -C /workspace/source rev-parse --abbrev-ref HEAD
stream closed: EOF for default/kaniko-golang-buildrun-jz5cg-ck5p4-pod (step-source-default)
step-build-and-push INFO[0002] Resolved base name ghcr.io/shipwright-io/shipwright-samples/golang:1.18 to build
step-build-and-push INFO[0002] Retrieving image manifest ghcr.io/shipwright-io/shipwright-samples/golang:1.18
step-build-and-push INFO[0002] Retrieving image ghcr.io/shipwright-io/shipwright-samples/golang:1.18 from registry ghcr.io
step-build-and-push INFO[0004] No base image, nothing to extract
step-build-and-push INFO[0004] Built cross stage deps: map[0:[/tmp/helloworld]]
step-build-and-push INFO[0004] Retrieving image manifest ghcr.io/shipwright-io/shipwright-samples/golang:1.18
step-build-and-push INFO[0004] Returning cached image manifest
step-build-and-push INFO[0004] Executing 0 build triggers
step-build-and-push INFO[0004] Building stage 'ghcr.io/shipwright-io/shipwright-samples/golang:1.18' [idx: '0', base-idx: '-1']
step-build-and-push INFO[0004] Unpacking rootfs as cmd COPY main.go . requires it.
step-build-and-push INFO[0030] COPY main.go .
step-build-and-push INFO[0030] Taking snapshot of files...
step-build-and-push INFO[0030] ENV CGO_ENABLED=0
step-build-and-push INFO[0030] RUN go build -ldflags "-s -w -extldflags '-static'" -o /tmp/helloworld main.go
step-build-and-push INFO[0030] Initializing snapshotter ...
step-build-and-push INFO[0030] Taking snapshot of full filesystem...
step-build-and-push INFO[0034] Cmd: /bin/sh
step-build-and-push INFO[0034] Args: [-c go build -ldflags "-s -w -extldflags '-static'" -o /tmp/helloworld main.go]
step-build-and-push INFO[0034] Running: [/bin/sh -c go build -ldflags "-s -w -extldflags '-static'" -o /tmp/helloworld main.go]
step-build-and-push INFO[0049] Taking snapshot of full filesystem...
step-build-and-push INFO[0050] Saving file tmp/helloworld for later use
step-build-and-push INFO[0050] Deleting filesystem...
step-build-and-push INFO[0050] No base image, nothing to extract
step-build-and-push INFO[0050] Executing 0 build triggers
step-build-and-push INFO[0050] Building stage 'scratch' [idx: '1', base-idx: '-1']
step-build-and-push INFO[0050] Unpacking rootfs as cmd COPY --from=build /tmp/helloworld ./helloworld requires it.
step-build-and-push INFO[0050] COPY --from=build /tmp/helloworld ./helloworld
step-build-and-push INFO[0050] Taking snapshot of files...
step-build-and-push INFO[0050] ENTRYPOINT [ "./helloworld" ]
step-build-and-push INFO[0050] EXPOSE 8080
step-build-and-push INFO[0050] Cmd: EXPOSE
step-build-and-push INFO[0050] Adding exposed port: 8080/tcp
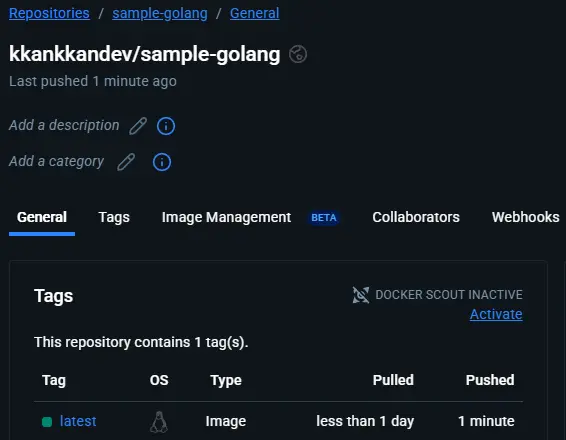
step-build-and-push INFO[0050] Pushing image to docker.io/gasida/sample-golang:latest
step-build-and-push INFO[0058] Pushed index.docker.io/gasida/sample-golang@sha256:7c81dca3f9b56047c21db204fcea3f6233c7cc782ebdcf679e3d140b9f2daacd
7.6.1. 상세 정보 확인
- step-source-default : 소스 코드 가져오는 데 사용
- step-build-and-push : 소스 코드 또는 도커파일에서 빌드를 실행 후 레지스트리에 푸시하는 단계
- step-results : 빌드 결과
1
2
3
4
5
6
7
8
9
10
11
12
13
14
15
16
17
# 빌드 파드 정보 확인
kubectl describe pod -l clusterbuildstrategy.shipwright.io/name=kaniko
kubectl describe pod -l clusterbuildstrategy.shipwright.io/name=kaniko | grep 'Image:' -B2

# 빌드 각 단계별 로그 확인
kubectl logs -l clusterbuildstrategy.shipwright.io/name=kaniko -c step-source-default
kubectl logs -l clusterbuildstrategy.shipwright.io/name=kaniko -c step-build-and-push
kubectl logs -l clusterbuildstrategy.shipwright.io/name=kaniko -c step-results

# CR 정보 확인
kubectl get buildruns.shipwright.io -o yaml | yq
kubectl get buildruns.shipwright.io
NAME                           SUCCEEDED   REASON      STARTTIME   COMPLETIONTIME
kaniko-golang-buildrun-jz5cg   True        Succeeded   11m         10m

# 다음 실습을 위해 삭제
kubectl delete build,buildrun --all
7.7. Shipwright 추가 정보
- 십라이트 Shipwright는 쿠버네티스의 빌드 API가 되는 것, 즉 쿠버네티스를 통한 좀 더 쉬운 자동화 방안을 개발자에게 제공하는 것을 목표로 시작되었다.
- 실제 빌드 작업 수행은 텍톤이 수행하므로, 쿠버네티스 위에서 좀 더 큰 규모의 파이프라인을 운용하고 싶을 때 좋다.
- 참고로 카니코 대신 빌다를 사용하려면 Build API를 이용할 때 ClusterBuildStrategy 에 다른 값을 지정하기만 하면 된다.
1
2
3
4
5
6
7
8
9
10
11
12
13
14
15
apiVersion: shipwright.io/v1alpha1
kind: Build
metadata:
  name: **buildpack**-nodejs-build
spec:
  source:
    url: https://github.com/shipwright-io/sample-nodejs
    **contextDir: source-build** # 빌다는 소스 코드에서 바로 컨테이너 이미지를 생성할 수 있다. 도커파일은 필요 없다
  strategy:
    name: **buildah**            # 빌다를 ClusterBuildStrategy로 선택
    kind: ClusterBuildStrategy
  output:
    image: quay.io/gitops-cookbook/sample-nodejs:latest
    credentials:
      name: push-secret
8. 실습 환경 정리
1
2
3
4
# 클러스터 삭제
kind delete cluster --name myk8s
docker ps
cat ~/.kube/config
9. Reference
- O’Reilly GitOps Cookbook - Kubernetes Automation in Practice
- Open Container Initiative - Home
- Docker - Home
- Docker - GitHub
- Google Cloud Docs - Jib
- Jib - GitHub
- Buildah - Home
- Buildah - GitHub
- Podman - Home
- Podman - GitHub
- Buildpacks - Home
- Buildpacks - GitHub
- Shipwright - Home
- Shipwright - GitHub
- Kaniko - GitHub
궁금하신 점이나 추가해야 할 부분은 댓글이나 아래의 링크를 통해 문의해주세요.
Written with KKamJi