Harbor에 컨테이너 이미지 업로드하기
Harbor에 컨테이너 이미지 업로드하기
저번 포스트에서 Harbor를 구축하는 과정을 다뤘습니다. 이번 포스트에서는 구축한 Harbor에 컨테이너 이미지를 업로드하고 다시 받아오는 과정에 대해 알아보도록 하겠습니다. Harbor를 구축하면서 자체 생성된 인증서를 사용하였기 때문에 해당 인증서를 Docker에 추가해주거나 insecure-registries 설정을 추가해주셔야 로그인이 가능합니다.
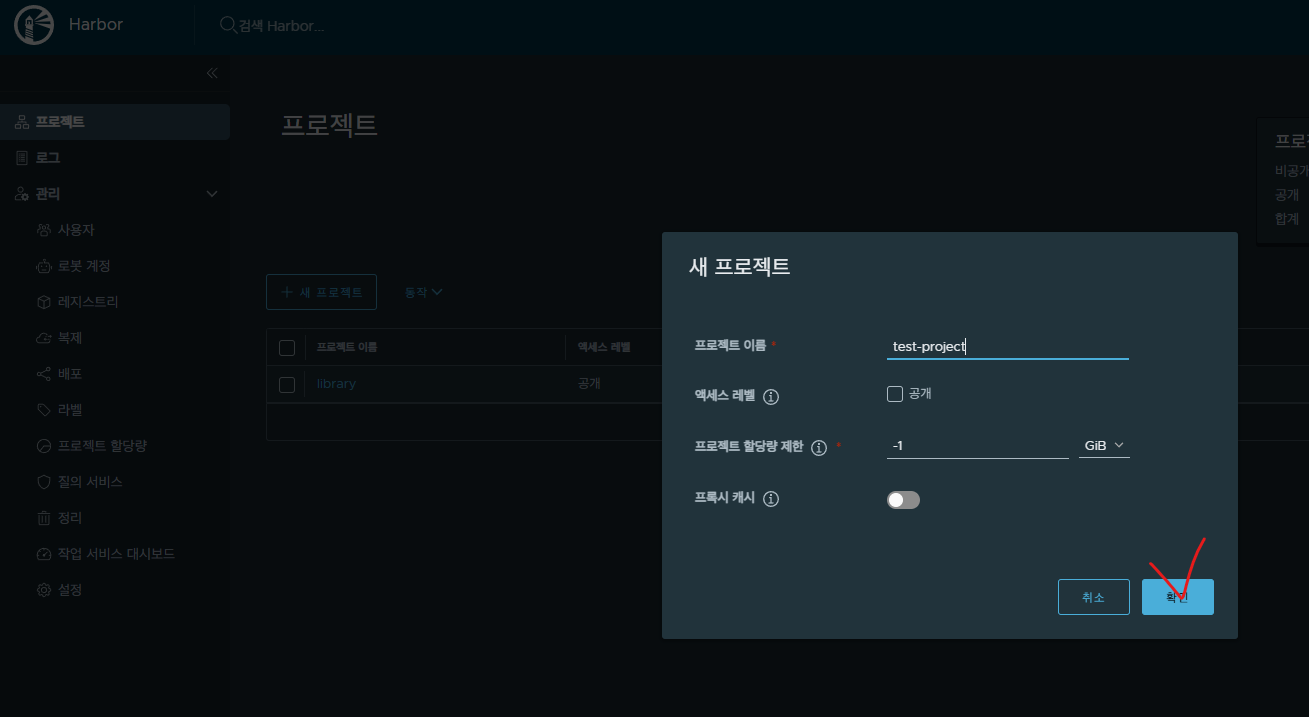
1. 프로젝트 생성
이미지를 업로드하기 위해서는 프로젝트가 생성되어 있어야 합니다. AWS ECR을 사용해보신 분들은 Repository를 생성한다고 생각하시면 될 것 같습니다.
2. Harbor 로그인
Docker CLI를 사용해 Harbor에 로그인 할 수 있습니다. 로그인에는 웹 브라우저에서 접속할 때 사용한 Username, Password가 필요합니다.
1
2
3
4
❯ docker login {your-harbor-domain}
Username: {your-username}
Password: {your-passowrd}
Login Succeeded
3. 테스트용 Docker 이미지 가져오기
1
❯ docker pull nginx:latest
4. 이미지 태그 변경
Harbor 레지스트리에 이미지를 업로드하기 위해서는 해당 이미지 태그를 Harbor의 도메인에 맞게 변경해주어야 합니다.
1
❯ docker tag nginx:latest {your-harbor-domain}/{project-name}/nginx:latest
5. 이미지 업로드
1
2
3
4
5
6
7
8
9
10
❯ docker push {your-harbor-domain}/{project-name}/nginx:latest
The push refers to repository [{your-harbor-domain}/{project-name}/nginx]
825fb68b6033: Pushed
7619c0ba3c92: Pushed
1c1f11fd65d6: Pushed
6b133b4de5e6: Pushed
3d07a4a7eb2a: Pushed
756474215d29: Pushed
8d853c8add5d: Pushed
latest: digest: sha256:719b34dba7bd01c795f94b3a6f3a5f1fe7d53bf09e79e355168a17d2e2949cef size: 1778
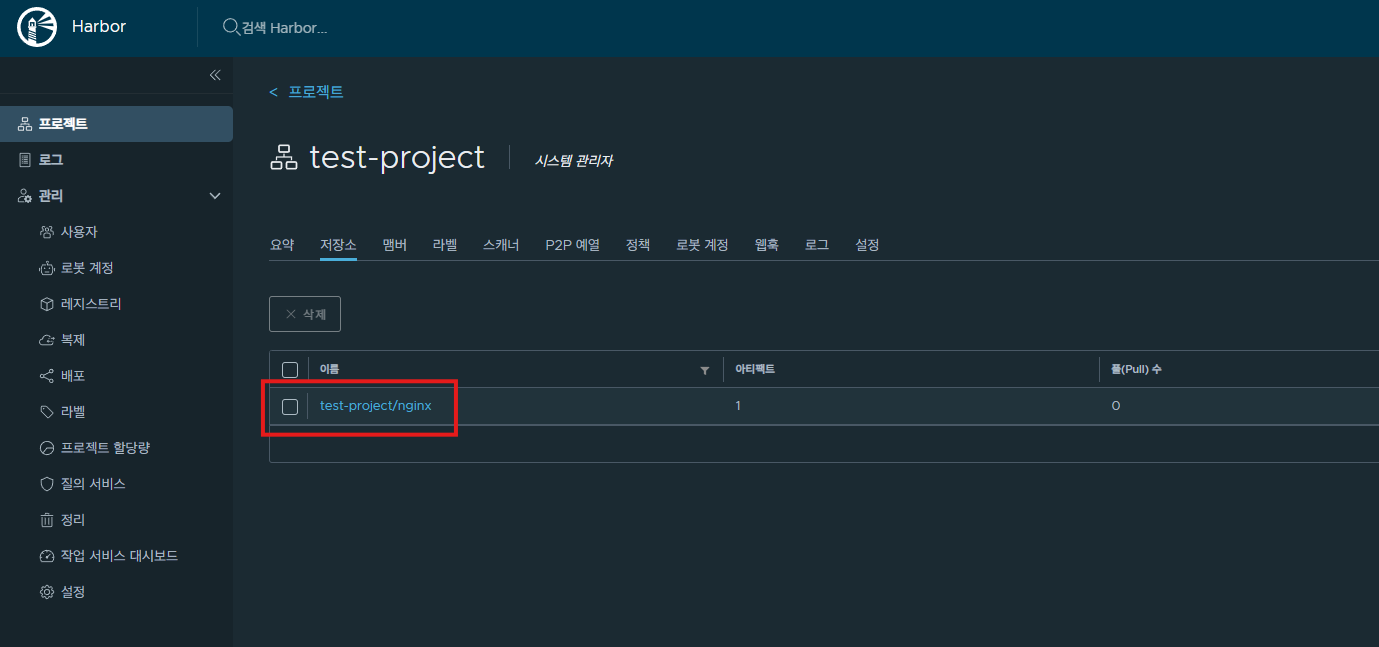
6. 확인
7. 이미지 다운로드
명확한 확인을 위해 모든 Docker 이미지를 삭제 후 다운로드 해보겠습니다.
1
2
3
4
5
6
7
8
9
10
11
12
13
14
15
16
17
18
❯ docker rmi $(docker images -q) -f

❯ docker pull {your-harbor-domain}/test-project/nginx:latest
latest: Pulling from test-project/nginx
302e3ee49805: Pull complete
d07412f52e9d: Pull complete
9ab66c386e9c: Pull complete
4b563e5e980a: Pull complete
55af3c8febf2: Pull complete
5b8e768fb22d: Pull complete
85177e2c6f39: Pull complete
Digest: sha256:719b34dba7bd01c795f94b3a6f3a5f1fe7d53bf09e79e355168a17d2e2949cef
Status: Downloaded newer image for {your-harbor-domain}/test-project/nginx:latest
{your-harbor-domain}/test-project/nginx:latest

❯ docker images
REPOSITORY                                TAG       IMAGE ID       CREATED      SIZE
{your-harbor-domain}/test-project/nginx   latest    7f553e8bbc89   5 days ago   192MB
궁금하신 점이나 추가해야 할 부분은 댓글이나 아래의 링크를 통해 문의해주세요.
Written with KKamJi
This post is licensed under CC BY 4.0 by the author.


